Before Installation
1)Preparing Your Flooring
Measure the square footage of your floor.
The pattern you’re laying your flooring in will affect how much you need. Measure the square footage of your floor (1 square meter is about 10.5 square feet). Then add 5-7% more square footage to account for waste if you’re laying your boards straight. Add 15% waste if you’re laying the floors in a herringbone pattern.

Let the flooring acclimate for 3 to 4 days.
Open your boxes of engineered hardwood in the room where you’ll be installing it. Make sure the pieces are flat, not leaning against something, which could warm them. Allow the flooring to sit for 3 to 4 days in that room so it can acclimate to the temperature and moisture and expand or contract as necessary. If you’ve recently installed new drywall or plaster, wait at least a week before opening your boxes of hardwood.

Avoid storing the hardwood in the basement or garage.
The moisture present in most basements and garages is bad for engineered hardwoods. It can warp the wood and permanently damage it.

2)Preparing the Subfloor
Remove any existing baseboards.
Use a razor knife to cut through the caulk where the baseboard meets the wall. Then, insert a pry bar behind the baseboard at the top, and gently tap down on the bar with a hammer until the pry bar is at least halfway down the wall behind the baseboard. Continue this along the baseboard until it completely comes away from the wall.

Take away any other obstructions.
This includes vent grates, end-caps on baseboard heaters, and anything else. Make sure you keep the hardware for these things together so you can reinstall them once your floors are finished.

Walk over the subfloor, listening for squeaks.
If any area of the subfloor squeaks, you can drill Phillips-head screws directly into the floor at that spot. The screw will tighten the subflooring and stop the squeaking.

Level out any bumps. Use a large sander to even out any area of the floor that is bumped up.
You can rent these types of sanders from most home improvement stores. When you’re leveling bumps, start slowly. You don’t want to sand off too much.

Fill in depressions with patching compound.
If there are any dents or divots—like those left behind by carpeting nails— fill them with patching compound. This is the same type of compound you’d use to patch holes in drywall. Fill any depressions deeper than 1 ⁄8 inch (0.32 cm) and let it dry before you sand it even with the rest of the floor. To sand down compound, you can sand by hand. The industrial sander for large areas on the subfloor will be too powerful.

Trim the bottom of doorways if the flooring won't fit.
Your new flooring may be thicker—and therefore need more clearance under doorways —than your old flooring. Place a scrap piece of the new flooring in front of the bottom of the door jamb. Then lay a handsaw on top of the flooring and slowly saw through the jamb. Repeat on the other side of the door and for all doors in the room.

Clean the subfloor.
Once you’re done sanding, sawing, and filling in the floor, sweep or vacuum up the debris. The subfloor should be totally clean. Any debris left there can cause your engineered hardwoods to look uneven.

Installing Floating Engineered Hardwood Floors
Install underlayment if you don’t already have it.
When installing floating engineered hardwood on a concrete floor, it’s best to do so on top of an underlayment. This will prevent the flooring from moving and also eliminate a crunching sound as you walk on the floor. Underlayment is a hard, thin, hard layer of foam, wood, or cement board. You can even use plywood, which can be nailed into place along the edges.
Set up spacers along the walls.
Most manufacturers require a certain amount of space between the edge of the flooring and the wall. This space varies by manufacturer, but is usually around 1 ⁄2 inch (1.3 cm). Your hardwood might come with spacers, or you can purchase your own from most home improvement stores.

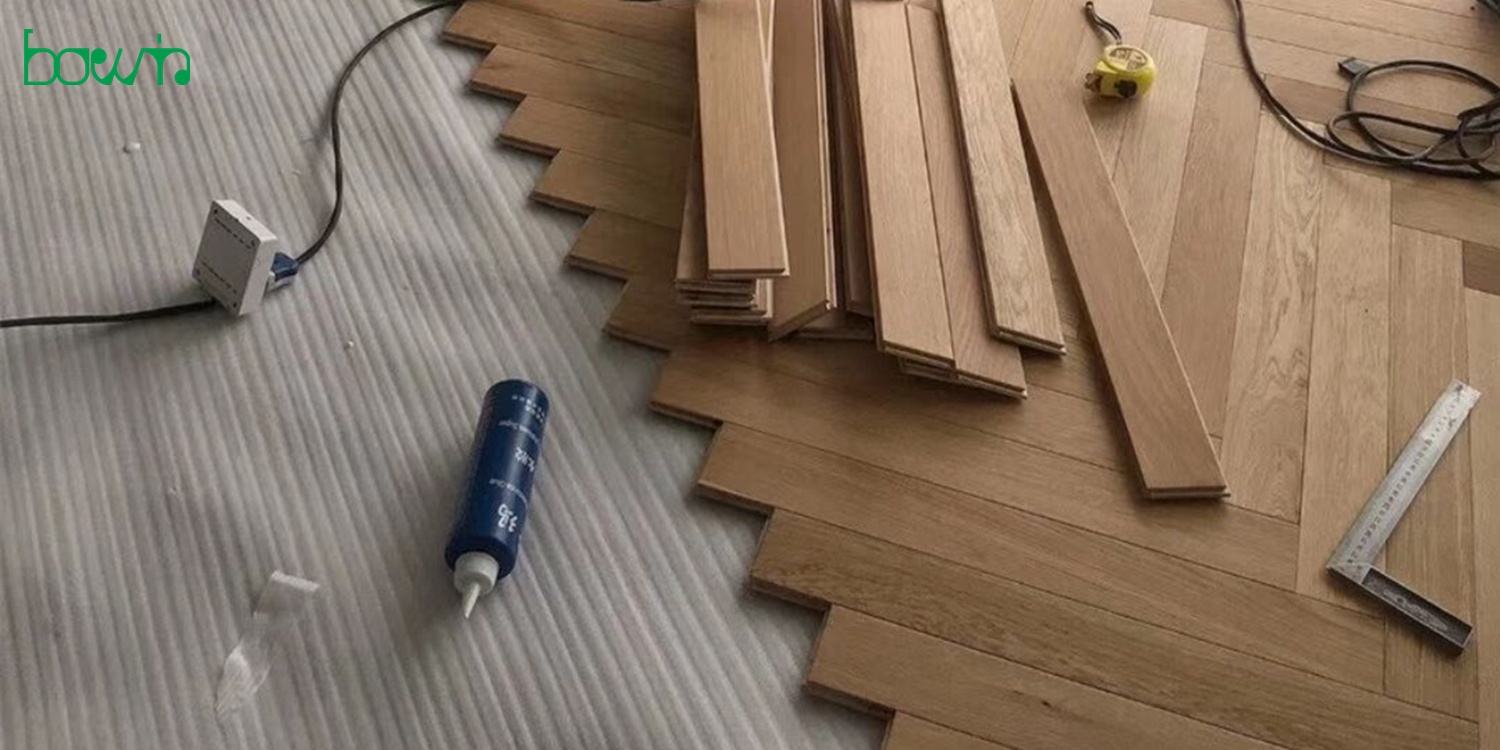
Apply glue to the groove of the board.
Each board will have a groove on one edge and a tongue on the other. When placed together, this allows the hardwood to snap together with no space between boards. Apply wood groove adhesive to the groove in each piece of wood. Lay it on the floor and then insert the tongue of the next board.

Use a tapper block and hammer to ensure a snug fit.
As you lay down each board and insert the tongue of one board into the groove of the next, set a tapping block on the end. Use a hammer or mallet to gently tap the tapping block to ensure each board is snug against the previous one.

Wipe up any excess glue as you go.
Once you tap the flooring together to ensure a snug fit, some glue might squeeze up between the boards. Immediately wipe this excess glue away with a damp rag. Otherwise it will be almost impossible to get off.

Use painters tape to secure each row.
Every 2–3 inches (5.1–7.6 cm) on each row, connect one row to the row after it with painters’ tape. This keeps the rows secure and prevents them from moving.

Use a flat bar to pull the last row of flooring against the one before it.
You won’t have room to get a tapping block and hammer between the last row of flooring at the wall. Instead, place the tapping block against the last row of flooring and then use a flat bar to pull it snug.

Install the trim.
Apply glue to the edge of the trim that will butt up against the last row of flooring. Carefully lay the trim on the subfloor, then press it against the edge of the last row of flooring.

Let the floor dry for 24 hours.
Once 24 hours have passed you can remove the painters’ tape and walk on the floor. You can also replace any furniture in the room.