Getting Started:
Determine the layout for the floor and the direction the pattern will run. Typically, the pattern will follow the length of the room.
Determine the centre line for the pattern, snap a chalk line along the entire length of the installation area as centre line. Then, snap a parallel chalk line 530mm to the left of the centre line and another 530mm to the right. These will serve as guides for the outer edges of the first two rows and the corner of each board should be checked once installed to ensure it is parallel to the chalk guideline. You may need to snap additional lines as guides for the outer rows as you proceed with the installation.
Prepare a perfectly square piece of plywood as starter board, 750mm x 750mm size.
Select your starting area in the middle of the room and screw the starter board on the sub-floor in a diamond position with the top and bottom points aligned with the centre line, starting at the nearest wall and following the central line.
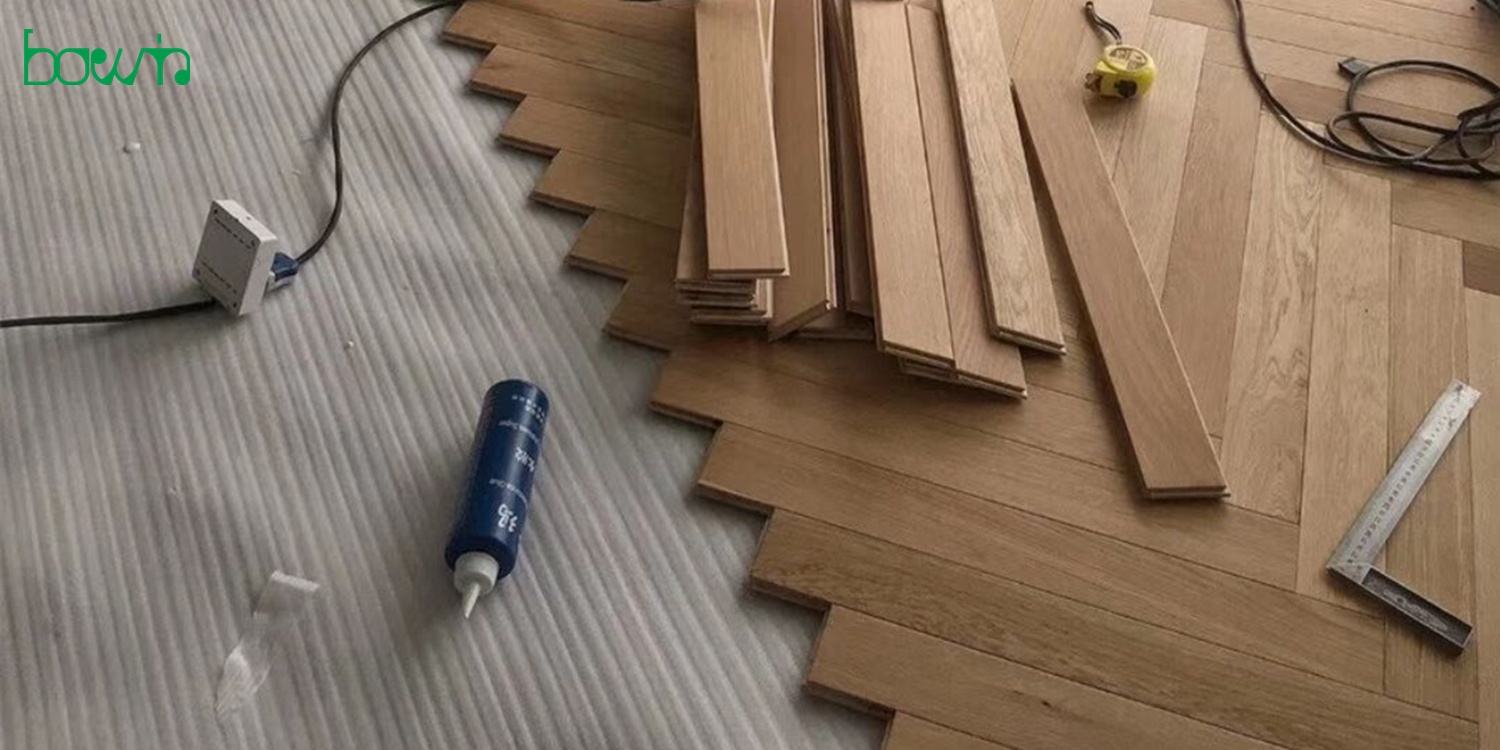
It is recommended to open a few cartons to sort the chevron planks into left and right tongues piles before installation.
Suggest using Bostick Ultraset SF or other similar type of adhesives specially formulated for wood flooring, strictly comply with all the instructions provided by the adhesive manufacturer.
Installation - Direct Stick / Glue Down
Begin installation in the area, spread the adhesive out from the edges of the starter board and over a reasonable area, use a 3-6mm notch trowel.
Set the first left-tongue plank to the left-hand side of the starter board with the grooved side snug to the starter board and the tongue side facing out towards the room, make sure the top side of plank be exactly in line with the centre line, press the left-tongue plank down with to the sub-floor over the moisture barrier membrane.

Set the right-tongue plank to the right-hand side of the starter board with the grooved side snug to the starter board and the tongue side facing out to towards the room, make sure the upper end is engaged with that of the left-tongue plank and the top side of plank be exactly in line with the centre line, press the right-tongue board down with to the sub-floor over the moisture barrier membrane.

Avoid pushing the board into place across the sub-floor as this may unevenly redistribute the adhesive. Instead, hold the new board above the sub-floor at an angle and engage the tongue and groove joint, then press the board directly down on the sub-floor.
Start the second left-tongue plank, place the new plank with the groove side snug to the tongue side of the first board, make sure the top side of plank be exactly in line with the centre line, press the plank down on sub-floor.
Continue the second right-tongue plank, place the new plank with the groove side snug to the tongue side of the first board, make sure the upper end is engaged with that of the second left-tongue board and the top side of plank be exactly in line with the centre line, press the right-tongue board down with to the sub-floor over the moisture barrier membrane.

Install the first 3 boards allow time for adhesive to cure before continuing with the installation in that section.
Start the next row, place the new left-tongue plank against the previous row, make sure its engaged with the previous right-tongue plank and press down, continue the second row with the right-tongue plank, make sure the upper end is engaged with that of the left-tongue plank and line up the tongues, press the right-tongue plank down. Snap a new parallel chalk line through the top end, this is the centre line of new row of flooring.

Continue working forward until the first two rows flooring are complete to the far wall, measure and cut the final row planks to fit, allowing 3-5mm expansion space to the wall. Remove the plywood starter board and work back to complete the first two rows.
Start the new rows as repeating the above instructions until the installation is completed. Measure and cut the final row planks to fit, allowing 3-5mmm expansion space to the wall.
Check measurements and row alignment frequently to ensure that the rows are staying true and square. If necessary, you can strap the boards by using the low tack masking tape. DO NOT USE ANY REGULAR MASKING TAPE AS IT MAY DAMAGE THE SURFACE.
Always snap a new chalk centre line with every row to server as guide line.
Spot weight across the floor plus weight any hollow areas to ensure floorboard and subfloor contact.
When installation is complete, remove all the masking tape from the floor. (Do not leave the masking tape on the floor more than 24 hours). Wait at least 24 hours before moving furniture or appliances onto floor.
Ensure no adhesive is forced into tongue & groove joints during installation. Avoid getting adhesive on the flooring surface, make sure clean up any seepage or spills immediately according to the adhesive manufacturer’s instructions.
***** If GrandOak Chevron Flooring was installed by direct sticking to concert slab with acoustic matting, the acoustic underlayment system is required in multi-residential developments to reduce noise transfer. Over a prepared slab—see above subfloor preparation, the qualified acoustic matting will need to be applied to the slab with Bostick Ultraset SF or other similar type of adhesives, using a 3mm notched trowel and allowed to dry according to the manufacturers’ specifications, then follow the above instructions to finish the installation.
Finishing
Removal of Glue Residue: It is vital that all glue residues are removed immediately after laying each prefinished board. If using ‘’Bostik Ultraset SF’’ (recommended) to glue down, use the ‘’Bostik Wipes’’ or a solvent suitable to the glue being used. Always test solvents first on an off- cut to establish that the solvent does not affect the colour or finish. Use a damp cloth to wipe away any solvent residue. Always follow the compound manufacturer’s usage instructions.
Once installation is complete, any spacing wedges used can be removed. The expansion gap around the perimeter of the floor can be covered by re-fitting the skirting boards, either by nailing, screwing or gluing directly to the perimeter walls. Never fix them directly to the installed floor. If the skirting boards were not removed for installation, you can cover the expansion gap using moulding trims that attach to the skirting with glue or panel pins. At doorways or where boards meet tiles or carpet, a door threshold strip should be used to protect the edges of the floor and provide a decorative transition from one floor type to another. Any visible joints or gaps should be filled with a non-silicon based filler (e.g. fuller caulk in colours) to match the colour of the timber.